Using a 5mm crochet hook:
- ch 5 & connect the last ch to the first ch with a sl st
- sc 5 into the middle of the ring, close with a sl st & ch1
- hdc x2 in each st around, close with sl st and ch 1
- hdc x2 in the first st, hdc in the next st… continue around, close with a sl st & ch1
- hdc x2 in first st, hdc x1 in following 2 sts… continue around, close with a sl st & ch 1
- hdc x2 in first st, hdc x1 in following 3 sts… continue around, close with a sl st & ch 1
- continue with the pattern of the last round until you have reached the crown diameter measurement you need for the hat you are making. To check the measurement for the hat size you want to make click here to see the hat size chart
- once you have reached the desired crown diameter measurement, you will continue on with 1 hdc in each st around until you reach the length you need (go back to the size chart for measurements)
- close final round with sl st & fasten off
Ear Flaps:
1st ear flap:
- determine where on the hat you would like the first ear flap to begin. I recommend leaving a larger gap at the front of the hat than the back!
- attach the yarn and ch 1
- row 1: sc in the next 12 sts, ch1 & turn
- row 2-3: sc in each st across, ch 1 & turn
- row 4: sc dec over next 2 sts, sc in next 8, sc dec over next 2 sts, ch 1 & turn
- row 5: sc in each st across, ch 1 & turn
- row 6: sc dec over next 2 sts, sc in next 6 sts, sc dec over next 2, ch 1 & turn
- row 7: sc in each st across, ch 1 & turn
- row 8: sc dec over next 2 sts, sc in next 4 sts, sc dec over next 2, ch1 & turn
- row 9: sc dec over next 2 sts, sc in next 2 sts, sc dec over next 2, ch 1 & turn
- row 10: sc dec over next 2 sts twice
- fasten off, fold over and weave in ends
2nd ear flap:
- fold hat in half (leaving slightly more space in the front of the hat than the back) and attach yarn, lining up with the first ear flap so that when the hat is warn the ears are even
- when you attach the yarn, ch 1
- sc in the next 12 sts, ch 1 & turn
- continue with rows 2-10 just like in the first ear flap
- fasten off, fold over and weave in ends
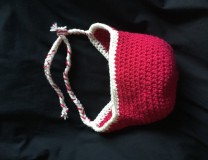
Edging:
- Attach yarn at back seam, ch1
- sc in eac hst around; working evenly around each ear flap.
- remember to mark your round with a st marker; do another sc around the entire beanie.
- close with a slip stitch in the first sc. Cut a long tail to weave in and out of stitches with our yarn needle
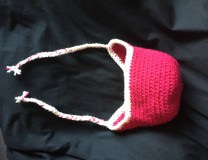
Braids:
cut 6 even lengths of yarn (double the length of what you want the braids to be). Pull halfway through the end of the ear flap & fold evenly. This will now give you 12 strands. Separate in 4’s and braid, tie in a knot at the end and repeat for the other ear flap.